A variety of application domains (ranging from ubicomp, through augmented reality,
all the way to roaming performance art) would benefit from a lightweight, portable,
battery powered projection device that could be used to display computer graphics.
Due to the lack of suitable commercial projectors of this type,
.:thePooch:. (part of the
computing department at Lancaster
University, UK) set about creating just such a device. Using simple and
cheap off-the-shelf components, it is possible to achieve unexpectedly good
results. There will obviously be resolution and brightness issues, as one would
expect with any low power device. However the device developed is practical for
a wide range of applications requiring small scale projections in suitably dark
environments.
 |
First take your handheld TV, and remove the casing. |
| Depending on the model, you may have to disconnect the speaker, ariel and
controls in order to fully remove the case. |  |
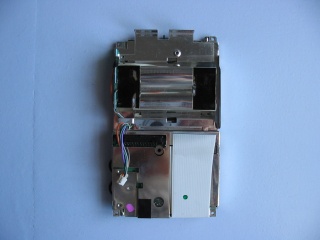 |
Once inside, turn the TV over and find the backlight module. |
| After you have removed this, you should be able to see the back of the LCD panel.
| 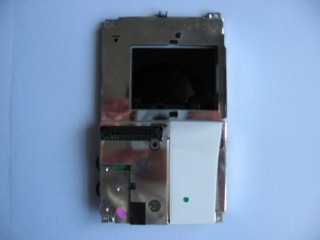 |
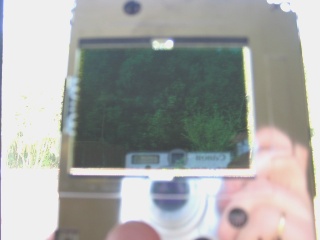 |
You should now be able to see through the transparent LCD panel (note the trees in the photo). |
| Once the TV has been prepared, the next step is to start on the case for the projector.
Use four lengths of batten as the main structure, with hardboard to provide solid sides.
| 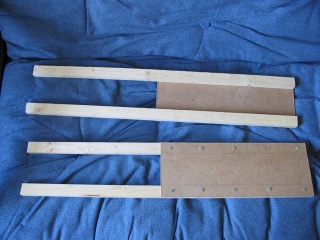 |
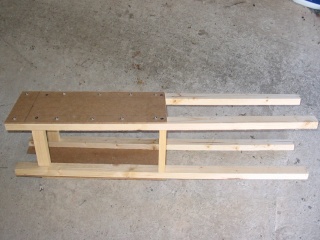 |
Join the two halves into one solid frame. |
| Add a box underneath to house the batteries and TV control circuitry
(requirements will differ depending on the model of TV used). The sides of
the frame can be added at this point in order to form an enclosed chamber
which will prevent light escaping in unwanted directions.
|  |
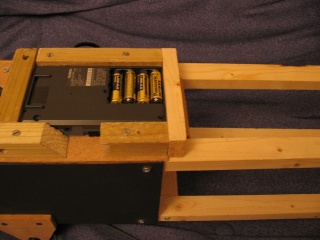 |
Put the batteries unit and control circuitry in place. |
| Things can get a little hot with the powerful spotlight, so attach
the cooling fan on the bottom of the unit (this will just about spin up
with a 9V battery). Note the fan on/off switch just to the left of the fan.
|  |
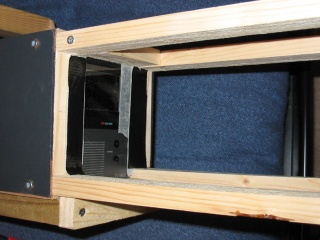 |
Next, solidly attach the prepared TV to the end of the encased chamber. Make
sure you get it the correct way up and the right way around to ensure the
proper orientation of the final projected image ! (remember that the lens
you add later will invert and mirror the image)
|
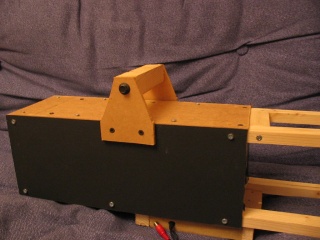
| Adding a handle will make the projector easier to carry and point around. |
 |
 |
Next prepare the lens, which is taken from a standard magnifying glass
(of any reasonable diameter). |
| Take a square of hardboard and cut a circular hole a little smaller than
the lens. Then place the lens in the hole. | 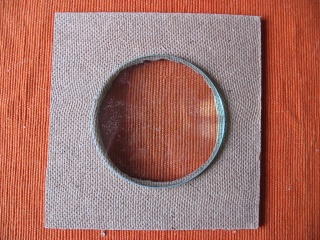 |
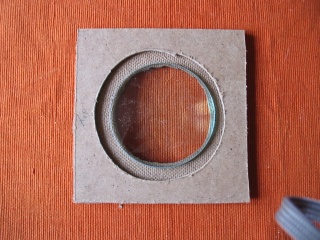 |
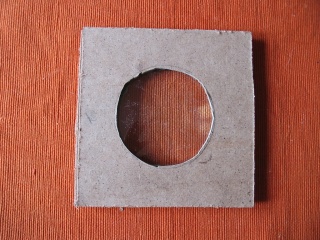
Add another square, with a slightly bigger hole, to act as a spacer. |
| Add a final square, identical to the first to finish the hardboard sandwich.
Then glue the three layers together with the lens in place.
|  |
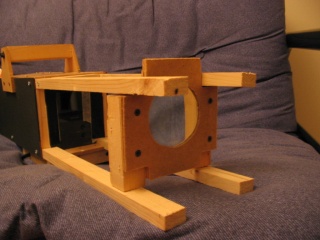 |
Add short pieces of battening to the lens sandwich and cut notches so that
it will fit between the four pieces of batten protruding from the main casing.
The lens unit should slide back and forth, but be held in place by some friction.
This is the sophisticated focusing mechanism ! |
| Then take your spotlight (the more powerful, the brighter the final image,
but the more heat build up you will have to contend with) | 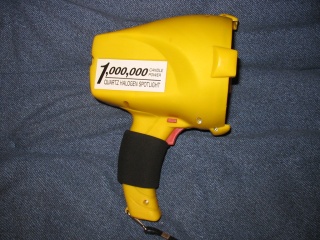 |
 |
Finally, attach the spotlight to the end of the encased cavity. |
| Attach the projector via an A/V cable to a laptop (which must obviously have a TV out
socket), switch on the TV, switch on the fan and pull the trigger on the spotlight.
Slide the lens unit until you get a sharp image. The photo to the left shows a video
clip being projected from about two meters onto a wall - the projected image was about
30 cm in height |  |